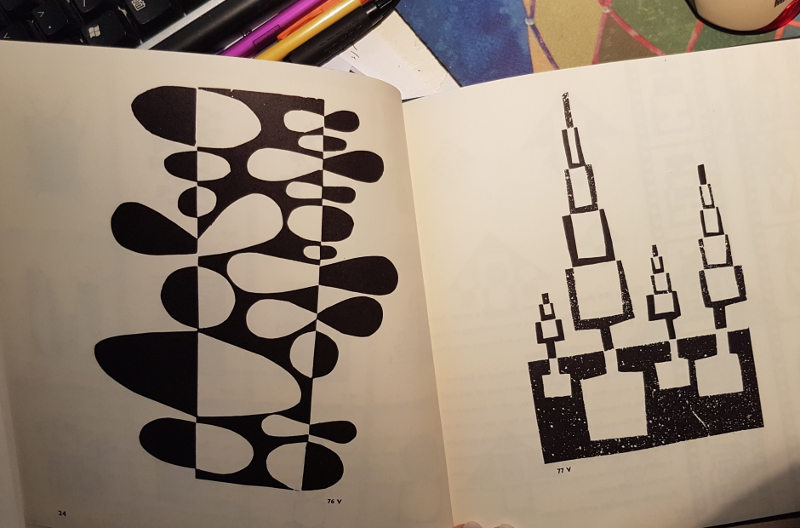
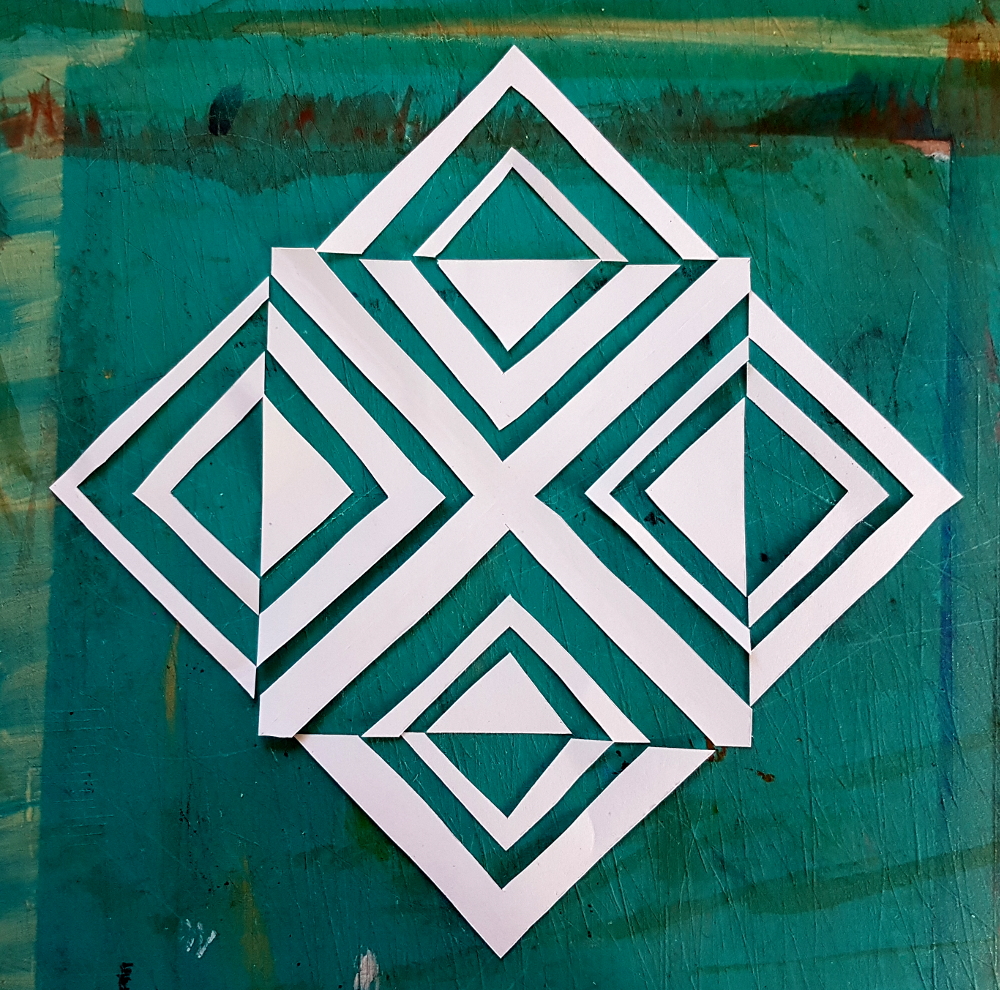
I checked out a copy of this marvelous old book from 1959 called Creative Paper Craft by Ernst Rottger. Had to get it on inter-library loan, as it’s now kind of hard to come by. (and then all the libraries shut down, so I’ve gotten to keep it for a nice long time!) Among other things, it has some fun exercises for cutting and expanding one sheet of paper, either by moving the cut pieces farther away from each other, or flipping them out from the edges. Below is one of my experiments in cutting and flipping.
A lot of fun for just one little square piece of scratch paper!
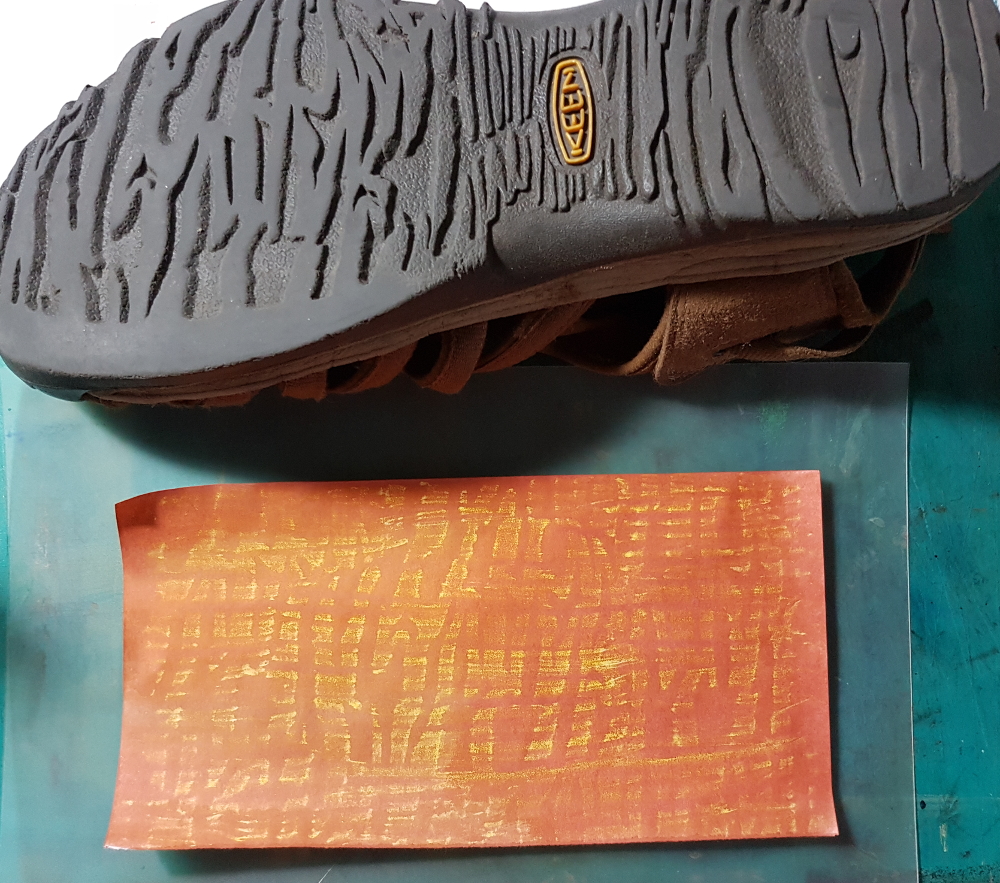
I took a rubbing of the pattern on the sole of my favorite Keen fisherman shoe with yellow crayon, then painted over it with red-orange watercolor. It came out better than I anticipated! I’ll cut it down and put it on the front of a greeting card.
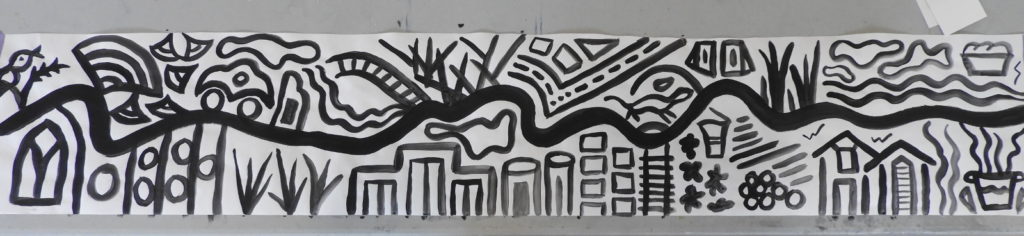
Being stuck at home, like we pretty much all are, I decided to do something I’ve always wanted to try; a design exercise called The Journey, from an artist named Kim Thitachai, who lives on the west coast of County Clare, Ireland. She wrote about this exercise in her book Experimental Textiles, which I have checked out from the library a couple times, and has a short online course about it.
Here is my first attempt at the process, with an explanation below each photo:
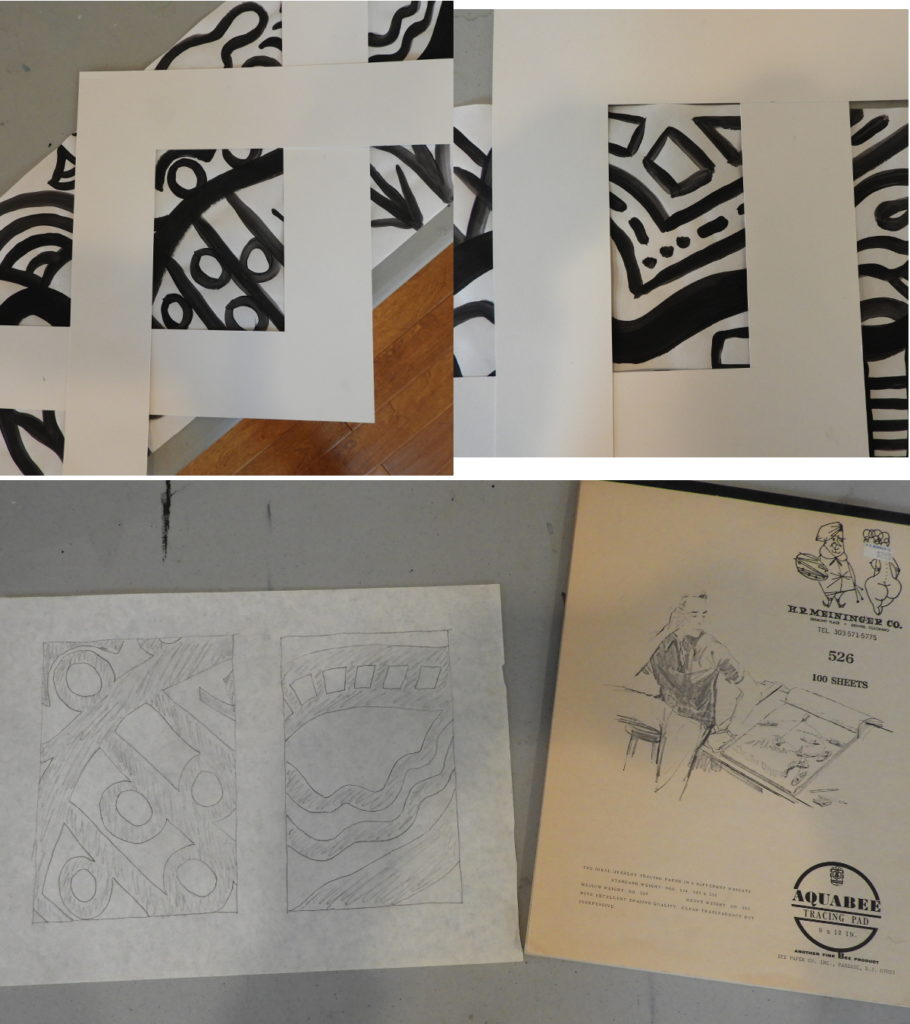
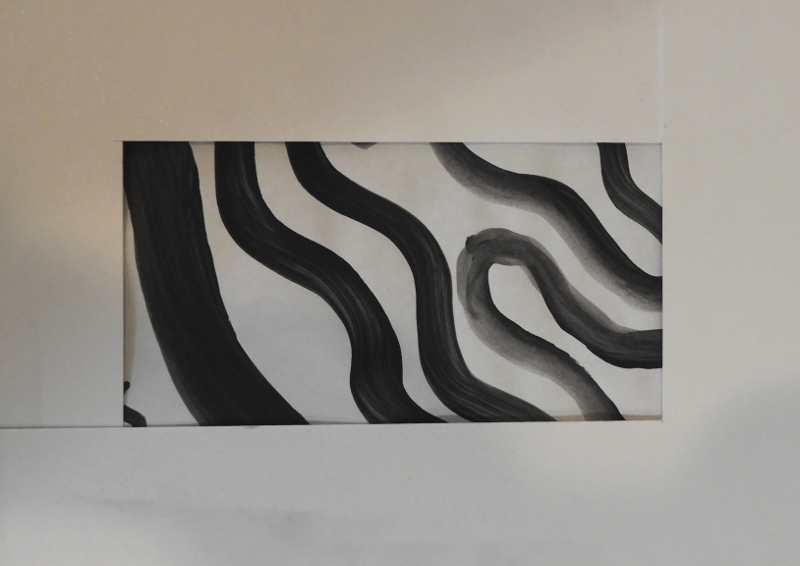
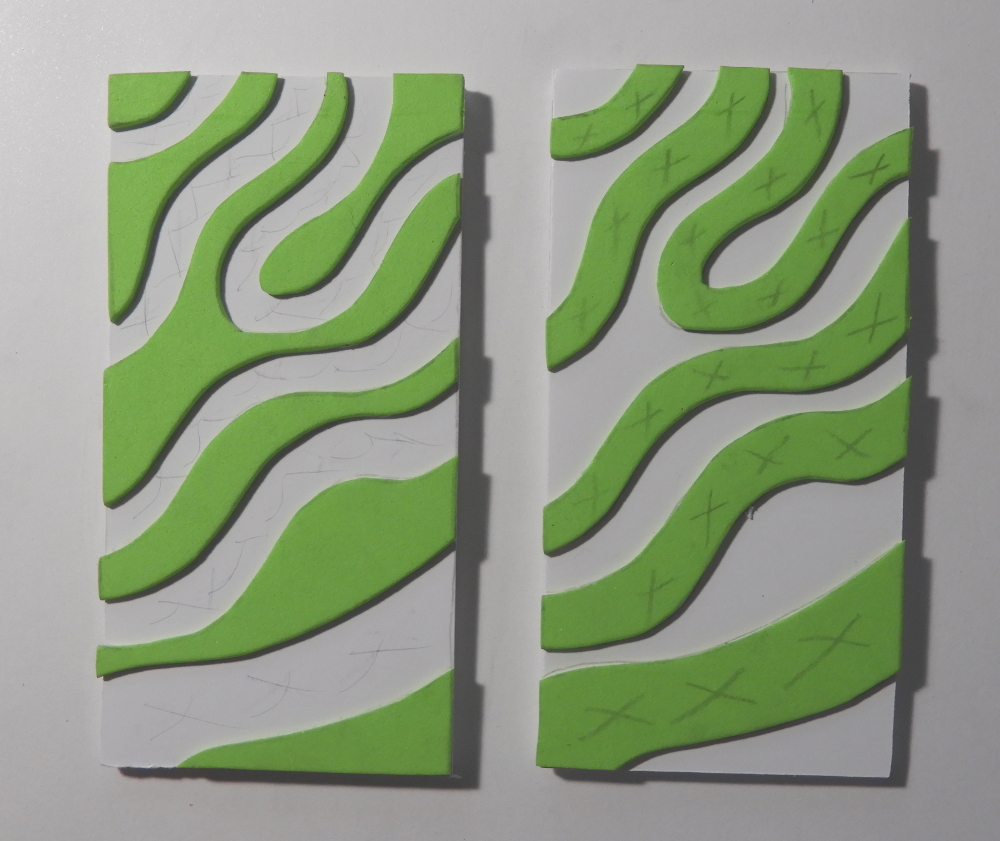
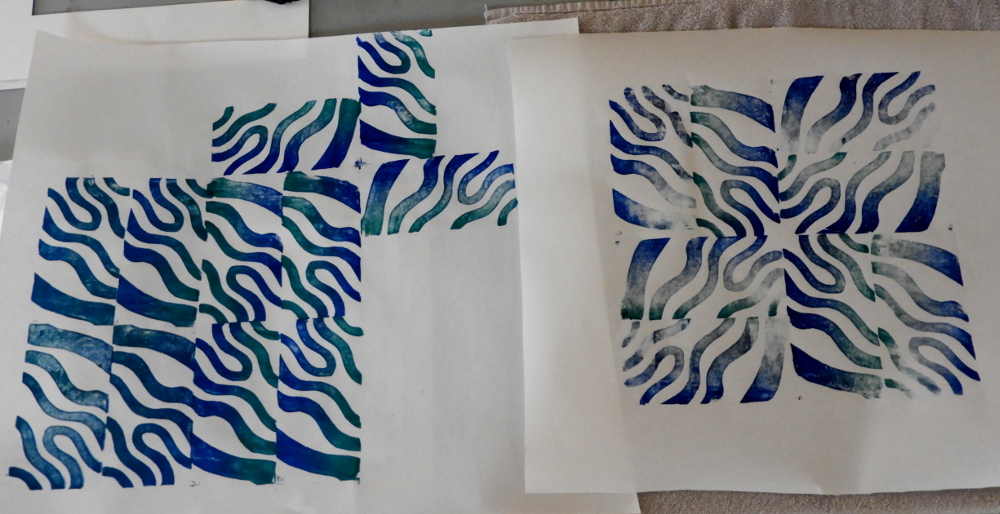
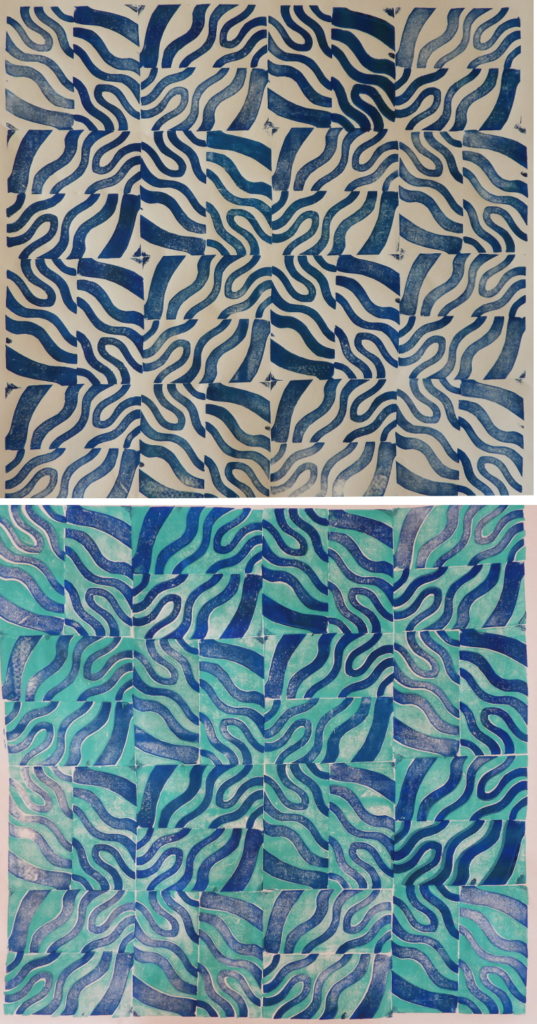
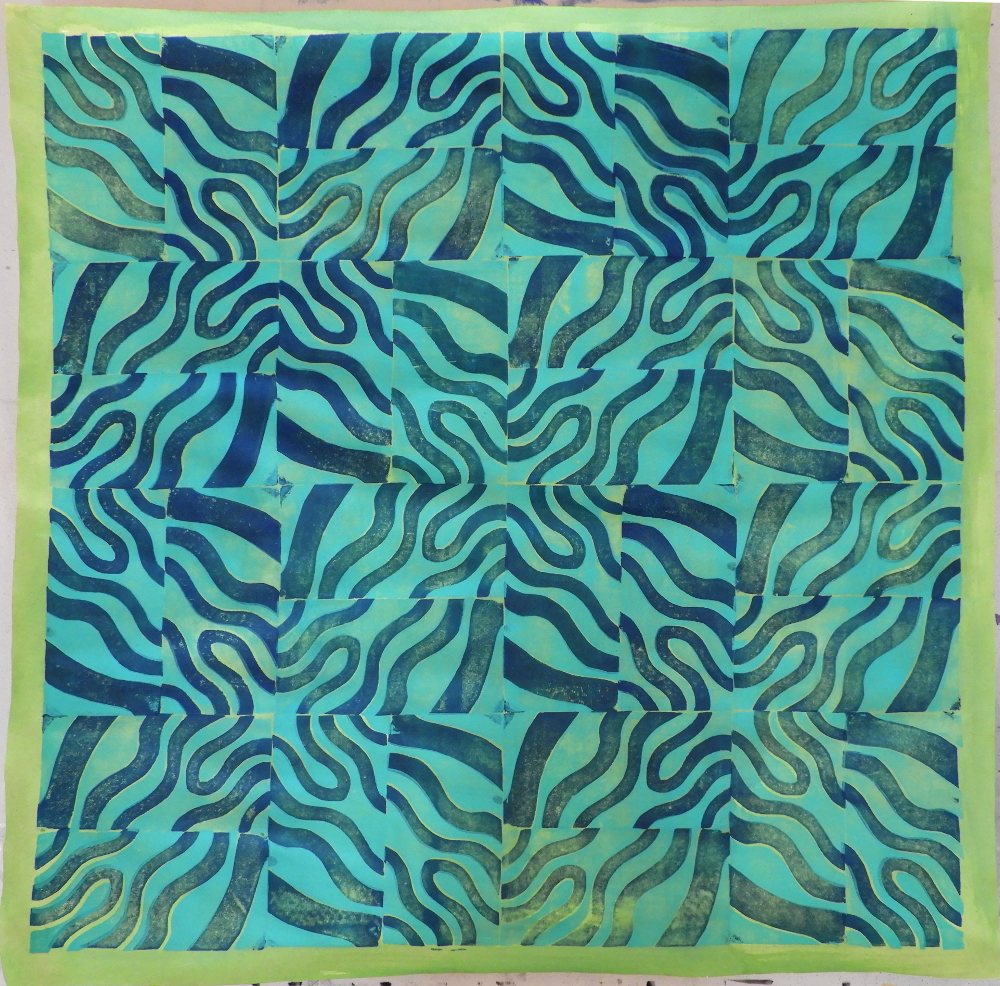
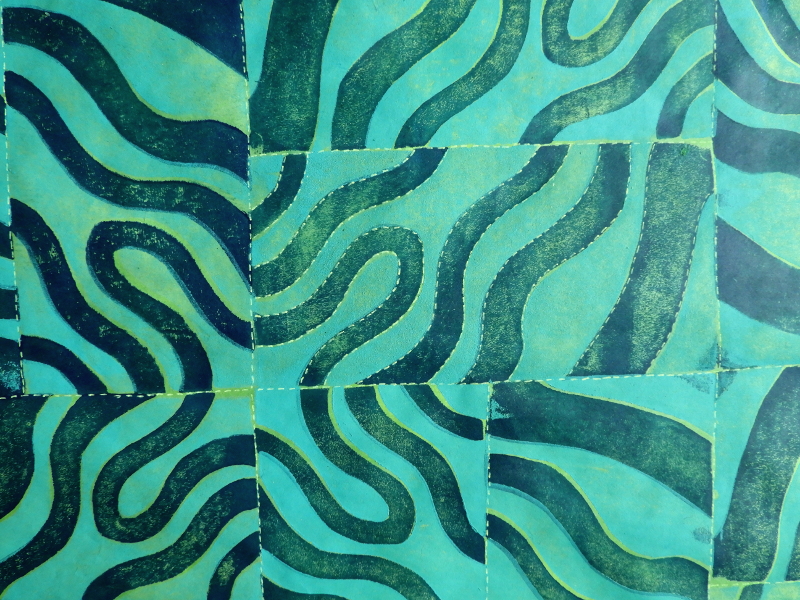
The first step is to make a quick loose painting with only black ink or watery paint, along a long strip of paper. (This is about 12″ x 65″) It doesn’t have to be “about” anything, but this happens to be the story of my day on a Saturday in March when I realized I needed to cancel the Play-Shop I was teaching that day, as it was time to start keeping ‘social distance’ to slow the spread of Covid19. Included in the day are my errands to the post office, hardware store, grocery store, petfood store, recycling center, and then home, where my sweetie had made fresh bread and hot soup.The next step is to use two “L”-shaped pieces of card to isolate sections of the design that might be interesting, and trace them. Here are a few parts I isolatedHere’s the final selection that I decided to use. I chose a fairly simple section, since it was my first attempt at this technique. It happened to be about twice as long in one dimension as the other, which came in handy for making repeats of a printing block.The next step is to transfer your traced design three times; once to a piece of craft foam, and twice to two pieces of foam core board. For the foam core you can use carbon paper to transfer the design, but that doesn’t work on craft foam, so I did that transfer by going over the lines on the back with a charcoal pencil, then rubbing over the design.Now the foam version is cut apart, and the positive shapes are glued to one of the foamcore pieces, and the negative shapes to the other piece.On some large scraps of paper, I experimented with various arrangements of the block. The medium is acrylic paint, applied to the block with a roller.By rotating the blocks as I printed, I came up with really interesting secondary patterns where the corners and sides of blocks met. Upper picture is just the positive block printed in dark blue, lower picture is the negative block printed over it in turquoise. The alignment of the blocks is never perfect, so there are lots of white spaces in between and within them.So in this final stage, I flooded the whole thing with what was essentially watercolor made by dissolving dye powder (of which I have a large stash) in water. I chose a bright yellow green, and it gave the whole thing a sort of 1960’s block-printed poster look.I decided that just as it was it lacked a something of a handmade touch, so as a last step, I used a light colored pen and drew stitching lines along the edges of all the blocks, and within some of them. Then I gave it a title; Coming Home. (because that’s the part of the original Journey painting I used.)